

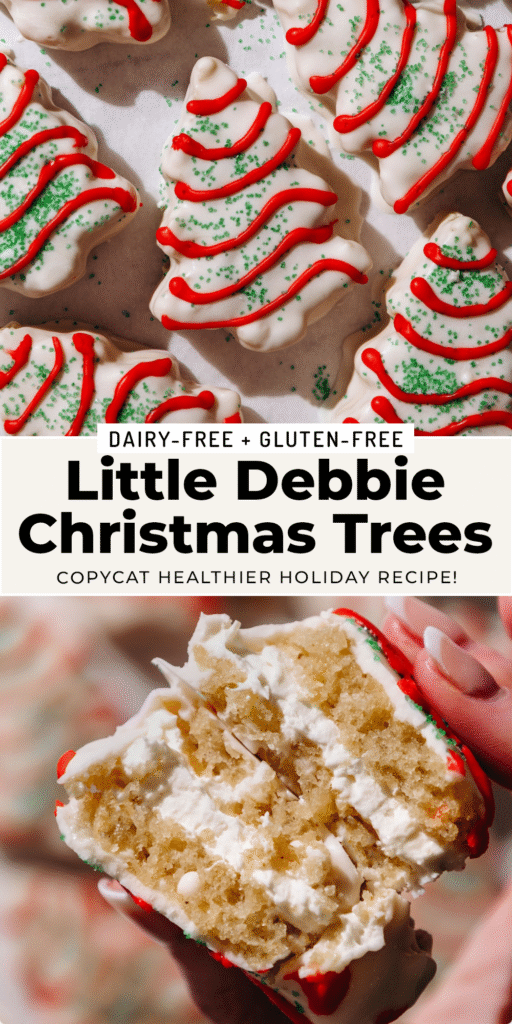
A homemade copycat of the classic Little Debbie Christmas Tree Cakes, made vegan and gluten-free. Two layers of tender almond flour vanilla cake sandwich a fluffy marshmallow cream filling, then each tree is dunked in white chocolate and finished with green sparkling sugar and a red icing garland. A nostalgic holiday treat for cookie swaps, parties, and gifting.

Table of contents
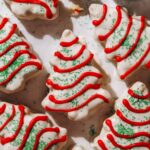
If there’s one store-bought treat that screams Christmas, it’s Little Debbie Christmas Tree Cakes. The second those boxes hit the shelves, it’s officially the holiday season. These gluten-free Christmas tree cakes bring back all that nostalgia, with no gluten, dairy, or eggs. Each one has two soft layers of almond flour vanilla cake, a fluffy marshmallow cream filling, and a crisp white chocolate shell. Then they’re topped with green sparkling sugar and that iconic red garland. They’re honestly even better than the original, and so fun to make for holiday parties, cookie swaps, or just a cozy afternoon of baking!
Why You’ll Love These Christmas Tree Cakes
- They taste SO much like the original. Soft vanilla cake, sweet marshmallow-y filling, and a crisp white coating, all made without gluten, dairy, or eggs. Nobody at the holiday party will guess they’re allergy-friendly!
- They’re easier than they look. The cake bakes as one thin sheet in under 15 minutes, and a cookie cutter does all the shaping, so there’s no fussy individual baking.
- They’re great for making ahead. They hold up beautifully in the fridge, so you can make them a few days before a party or cookie exchange.
- They’re perfect for gifting. They make the cutest addition to a cookie tray or holiday gift box.

Ingredients for Vegan Christmas Tree Cakes
For the cake, a mix of almond flour and gluten-free flour gives you a tender, moist crumb that’s sturdy enough to stack and coat. Use a 1-to-1 gluten-free baking blend that includes xanthan gum. The cake also uses nondairy milk mixed with a bit of apple cider vinegar to make a dairy-free “buttermilk,” which reacts with the baking powder and baking soda to keep the cake light and fluffy. Cane sugar, salt, vanilla, and a little almond extract round it out and give it that classic snack cake flavor.
The cream filling is whipped dairy-free butter, powdered sugar, vanilla, and marshmallow creme. I used Dandies vegan marshmallow creme to keep this recipe fully vegan as most conventional brands contain egg whites. The marshmallow creme is what gives the filling that light, almost cloud-like texture that tastes just like the original.
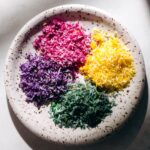
For the coating, you’ll melt dairy-free white chocolate chips with a little coconut oil, which thins it out so it coats the trees smoothly and sets up with a nice snap. I love Enjoy Life white chocolate chips here. Green sparkling sugar gives the trees that classic sparkly look, but if you want to skip the artificial dyes, my homemade dye-free sprinkles in green make a great swap. The red garland is a simple icing made from powdered sugar, nondairy milk, and a few drops of red food coloring.
How to Make Gluten-Free Christmas Tree Cakes
First up, the cake! Preheat your oven to 350°F and line a big 18×13-inch baking sheet with parchment. Whisk the almond flour, gluten-free flour, sugar, baking powder, baking soda, and salt together in a large bowl. In another bowl, stir the apple cider vinegar into the nondairy milk and let it hang out for about 5 minutes. It’ll curdle a little, which is exactly what you want for this “vegan buttermilk”. Stir in the vanilla and almond extracts, then pour everything into the dry ingredients and whisk until just combined.
Spread the batter out in an even layer and bake for 12 to 14 minutes. Once it’s completely cool, slice it in half widthwise. The cake is pretty thin and delicate, so I like to use the parchment to slide one half over onto a second pan.
Now for my favorite part, the filling! Whip the dairy-free butter and marshmallow creme together until it’s super light and fluffy. Add the powdered sugar and vanilla, mix on low so you don’t end up in a sugar cloud, then crank it up to high and whip until it’s dreamy and creamy. Spread it over one half of the cake, then gently set the other half on top like a big cake sandwich.
Pop the whole thing in the freezer for an hour. Trust me, firm cake makes cutting so much cleaner! Then grab your Christmas tree cookie cutter and cut out as many trees as you can. You should get about 8 to 10, depending on the size of your cutter. Back into the freezer they go for another hour, since frozen trees are way easier to coat.
Time to dress them up! Melt the white chocolate chips and coconut oil together until smooth. Using two forks, dunk each tree in the chocolate, turn it to coat all sides, and let the extra drip off before setting it on a parchment-lined pan. Sprinkle on the green sugar right away, because once the chocolate sets, it won’t stick. Then let the trees chill in the fridge until the coating is totally firm.
For the finishing touch, whisk together the powdered sugar, nondairy milk, and red food coloring, then spoon it into a piping bag or squeeze bottle. Zigzag those iconic garland stripes across each tree, let the icing dry until it’s firm to the touch, and dig in!

Tips for a Smooth White Chocolate Coating
The biggest secret here is making sure your trees are fully frozen before you dip them. Cold cake helps the chocolate set almost instantly, so you get a smooth, even coating without crumbs sneaking in. Go slow when melting the white chocolate, either in short bursts in the microwave or over a double boiler, since it’s way more sensitive than dark chocolate and can scorch or seize if it gets too hot. The coconut oil thins it out to the perfect dipping consistency, but if it starts to thicken up while you’re working, just pop it back in the microwave for a few seconds. And work in small batches, keeping the rest of the trees in the freezer until you’re ready for them!
Dye-Free Decorating Options
Want to skip the artificial dyes? Swap the green sparkling sugar for my homemade dye-free sprinkles in green. They give the trees that same festive pop, just with natural colors. For the red garland, you can tint the icing with a little beet powder instead of food coloring. Just know it’ll come out more of a pretty pinkish-red than the bright red of the original.
Make Ahead and Storage
These are a great make-ahead treat! Since the white chocolate fully coats each tree, it seals in the moisture and keeps the cake soft for days. Store the finished trees in an airtight container in the fridge, where they’re best within 4 to 5 days but will keep for up to a week.
If you want to get a head start, you can bake the cake ahead of time and freeze it. Just wrap it well, then let it thaw before filling, cutting, and decorating. I don’t recommend freezing the fully finished trees, though, so save the coating and decorating until you’re ready to serve.

Recipe FAQs
Yes, it’ll work the same way in the filling. Just know that most traditional brands contain egg whites, so the cakes won’t be vegan. Dandies is my go-to for a vegan version.
No problem! You can cut the cake into squares or rectangles for classic snack cakes, or use any other holiday cookie cutter you have, like stars or snowflakes.
I highly recommend it! Frozen cake is much easier to cut cleanly, and it helps the white chocolate set almost instantly, so you get a smooth coating without crumbs.
You’ll get about 8 to 10 trees, depending on the size of your cookie cutter. Save the scraps for snacking!
More Gluten-Free Holiday Treats
If you love these Christmas tree cakes, here are a few more festive bakes to add to your holiday lineup:
- Frosted Gingerbread Cookie Bars
- Gingerbread Cutout Cookies
- Gingerbread Caramel Slice
- Sugar Cookie Snowmen
If you try these Gluten-Free Christmas Tree Cakes, let me know what you think by leaving a comment or rating below! Be sure to follow along on Pinterest, Instagram, and Facebook for even more yummy recipes!

Gluten-Free Christmas Tree Cakes (Little Debbie Copycat)
- Prep Time: 1 hour
- Chilling Time: 2 hours
- Cook Time: 14 minutes
- Total Time: 3 hours 14 minutes
- Yield: 8 cakes 1x
- Category: cakes
- Method: baking
- Cuisine: american
- Diet: Gluten Free
Description
A homemade copycat of the classic Little Debbie Christmas Tree Cakes, made vegan and gluten-free. Two layers of tender almond flour vanilla cake sandwich a fluffy marshmallow cream filling, then each tree is dunked in white chocolate and finished with green sparkling sugar and a red icing garland. A nostalgic holiday treat for cookie swaps, parties, and gifting.
Ingredients
Vanilla Cake
- 1 cup (112g) almond flour
- 1 cup (124g) gluten-free flour
- 3/4 cup (150g) cane sugar
- 2 tsps baking powder
- 1/2 tsp baking soda
- 1/2 teaspoon salt
- 1 cup (240ml) nondairy milk
- 1 teaspoon apple cider vinegar
- 1 tablespoon pure vanilla extract
- 1/2 tsp almond extract
Cream Filling
- 1/2 cup (112g) dairy-free butter, softened to room temperature
- 1/2 cup (90g) vegan marshmallow cream
- 1 1/2 cups (180g) powdered sugar
- 1 tsp vanilla extract
White Chocolate Coating
- 12oz dairy-free white chocolate chips
- 2 tbsp coconut oil
To Decorate
- 1/2 cup (60g) powdered sugar
- 1–2 tbsp nondairy milk
- Red food coloring
- Green sparkling sugar
Instructions
- Preheat the oven to 350°F and line a cookie sheet (18×13”) with parchment paper.
- Whisk together the flours, sugar, baking powder, baking soda, and salt. In a separate bowl, stir the vinegar into the nondairy milk. Set aside 5 minutes, then add the extracts and stir to combine. Add to the dry ingredients, and whisk until combined.
- Pour batter onto the prepared pan, and spread evenly. Bake for 12-14 minutes.
- Cool completely, then slice in half width-wise. Use the parchment paper to carefully transfer one half to a new pan.
- Whip together the butter and marshmallow cream with a hand mixer or stand mixer until light and very fluffy. Add the powdered sugar and vanilla. Mix on low until combined, then turn the mixer up to high and whip until fluffy and creamy.
- Spread onto one half of the cake using an offset spatula, then carefully place the other half of the cake on top. Freeze this cake sandwich for 1 hour.
- Use a cookie cutter to cut the cake into Christmas tree shapes (you will get 8-10 depending on the size of your cookie cutter). Freeze 1 hour, this will make coating them in white chocolate much easier.
- Melt the white chocolate and coconut oil together. Use two forks to carefully dunk each cake in the white chocolate coating on all sides. Let the excess drip off before transferring to a parchment lined pan. Immediately add the green sugar sprinkles (otherwise they won’t stick). Place the cakes in the refrigerator until the white chocolate is fully set.
- Whisk together the powdered sugar, nondairy milk, and red food coloring. Transfer to a piping bag or squeeze bottle. Add red garland strands to each tree, allowing it to dry fully before serving.
- Keep leftovers in an airtight container in the refrigerator for up to one week.
Keywords: christmas, holiday, white chocolate, cake, frosting, marshmallow, dairy free, gluten free



Leave a Reply