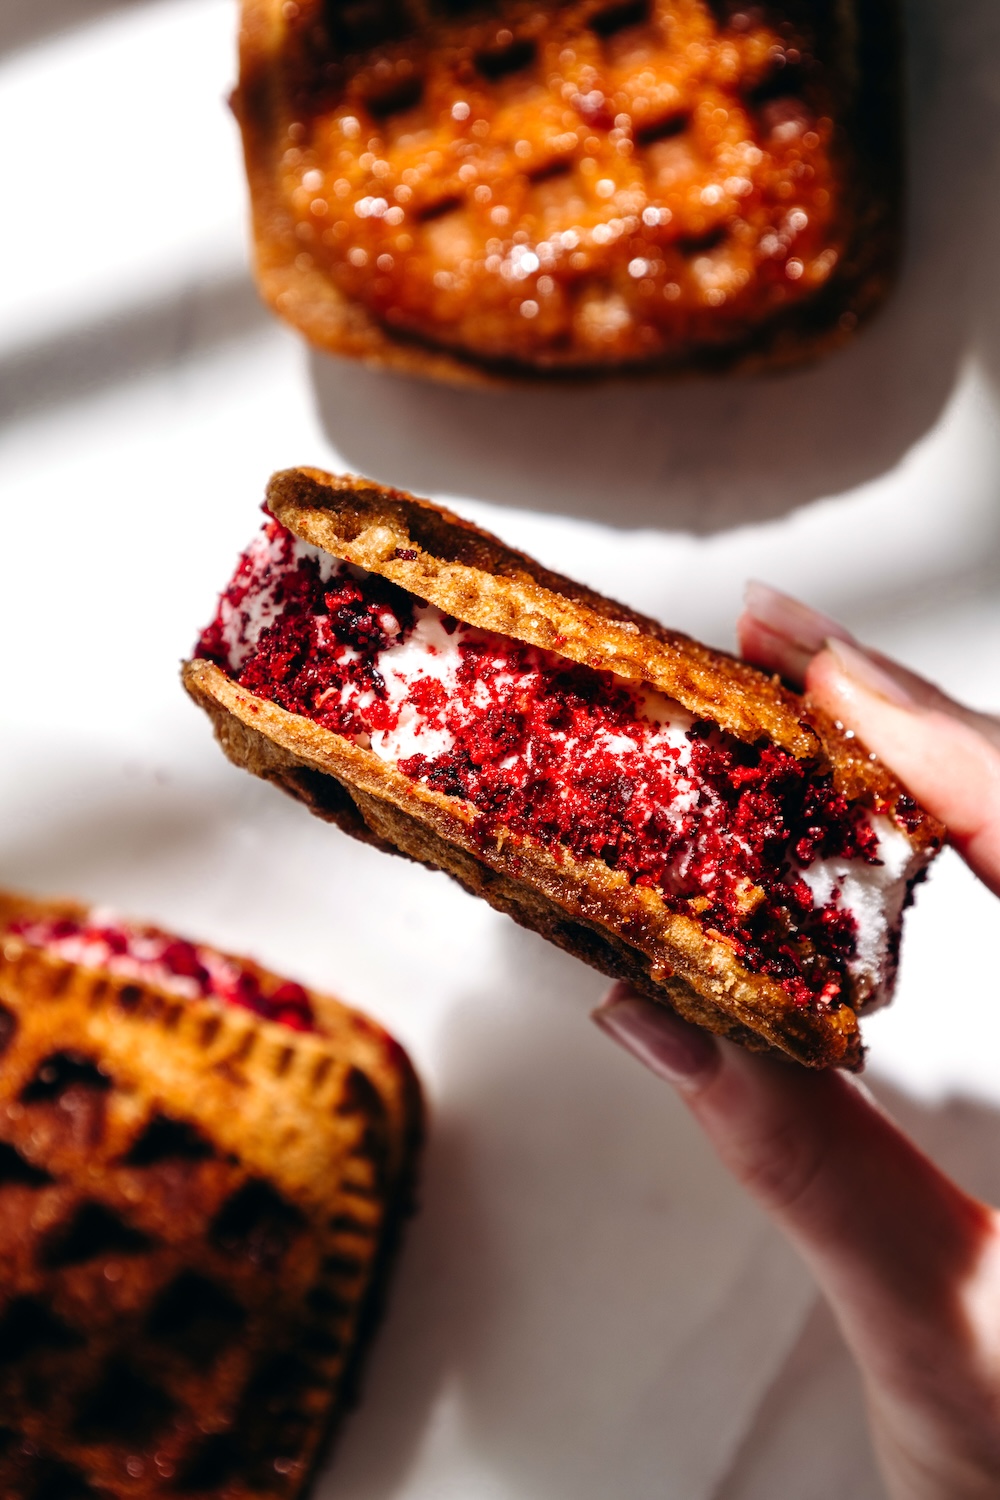
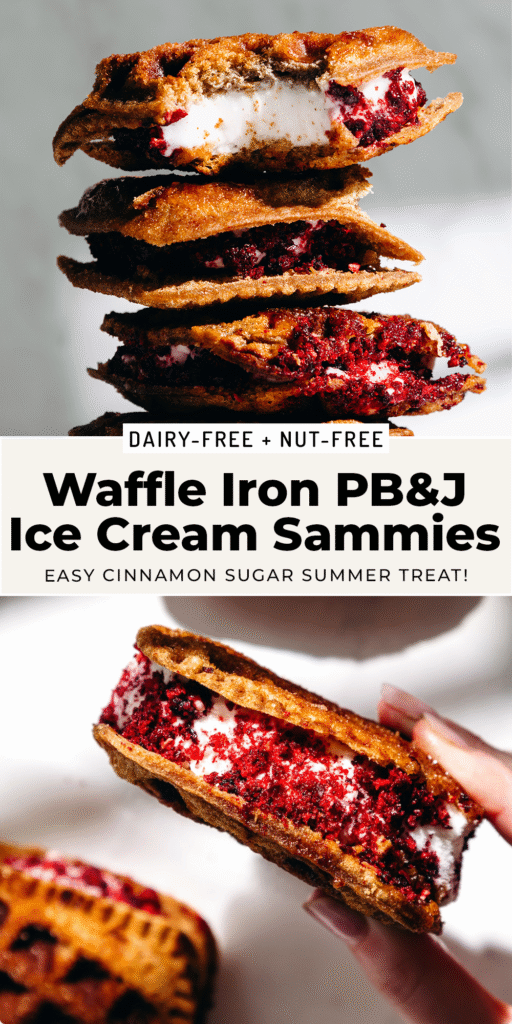
Take SunButter Jammies, press them in a waffle iron with cinnamon sugar until golden and crispy, then sandwich with dairy-free vanilla ice cream and roll in freeze-dried fruit dust. The easiest nut-free, vegan ice cream sandwich of the summer!
SPONSORED BY SUNBUTTER
Table of contents
Think: sandwich turned into a triple-stuffed melty dessert sandwich. Childhood nostalgia meets summertime sweet treat in the easiest to make ice cream sandwiches with no baking or churning required.
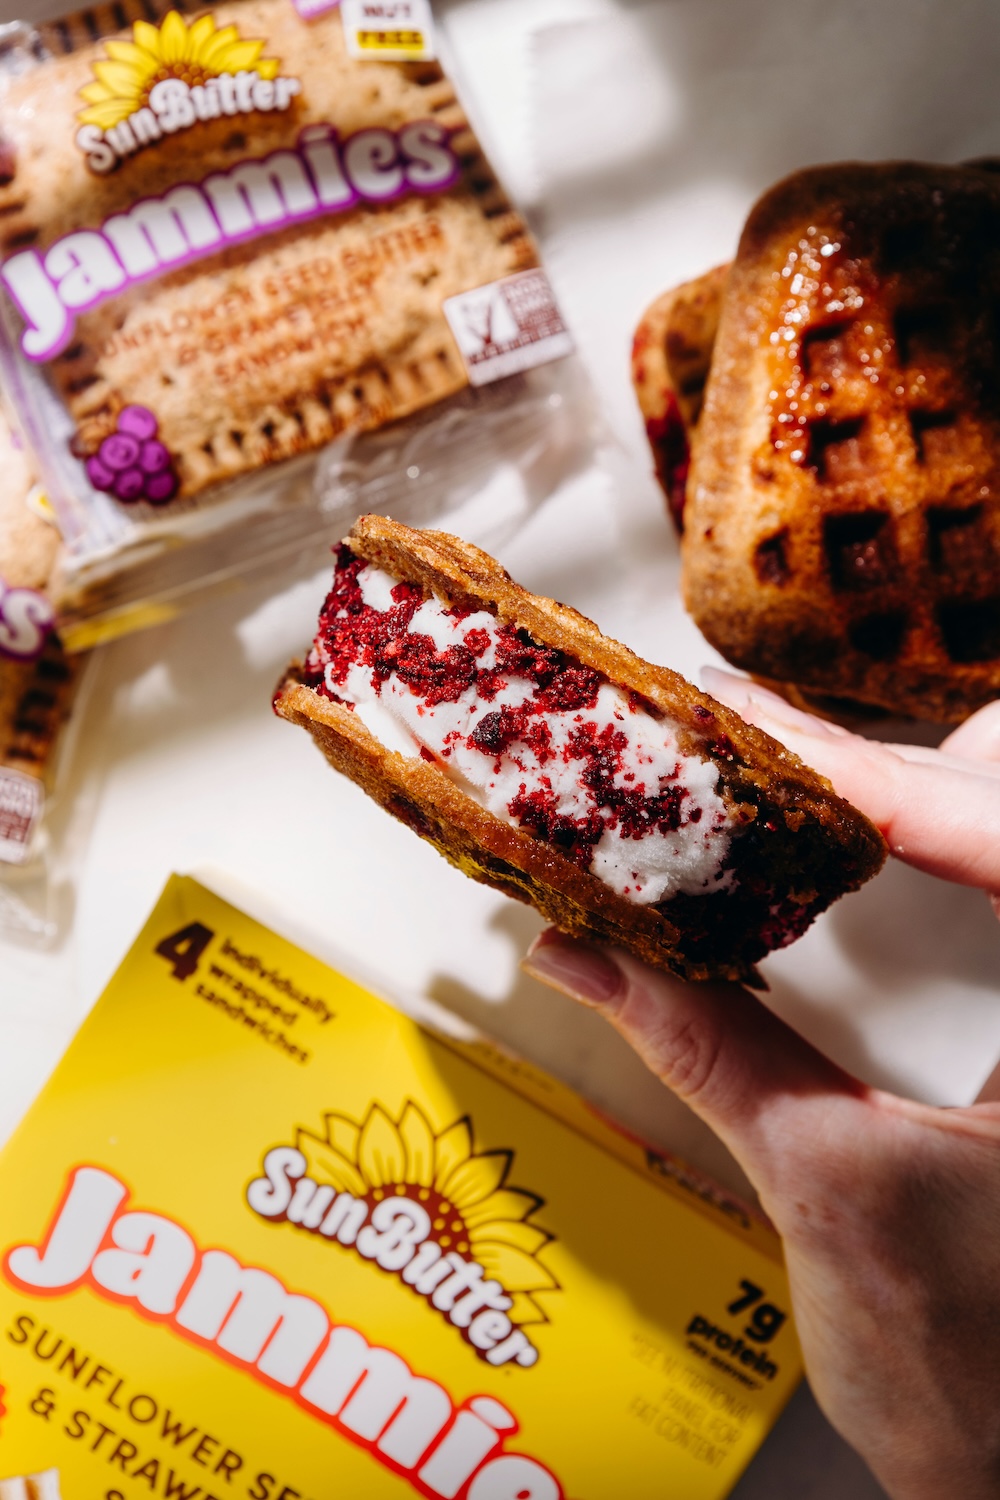
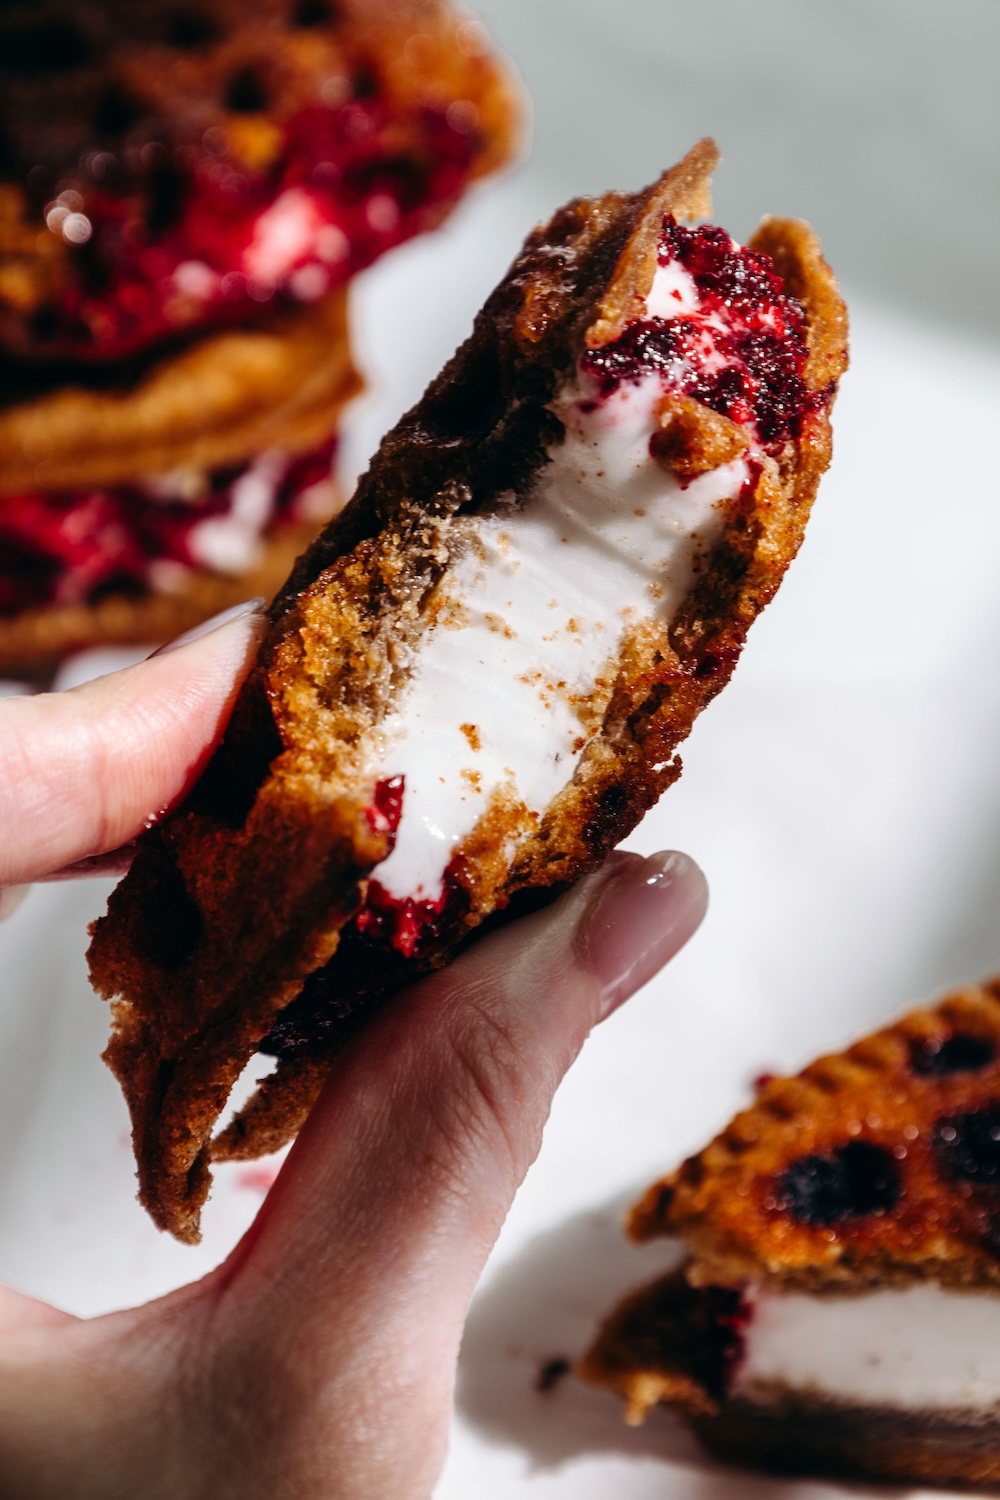
We’re taking SunButter Jammies — those adorable little nut-free “PB&J” uncrustable-style sandwiches — pressing them in a waffle iron with a coating of cinnamon sugar until they’re golden and crispy, then sandwiching them around a big scoop of dairy-free vanilla ice cream. Last but not least for an extra pop of fruity flavor, we’re rolling the whole thing in freeze-dried grape or strawberry dust for this gorgeous, tangy, crackly coating that makes them look as good as they taste.
No nuts, no dairy, no baking. Just pure summer nostalgia in a handheld frozen treat.
What Are Jammies? (The Secret Ingredient)
SunButter Jammies are delicious nut-free, pre-filled PB&J-style sandwich squares. Think of them like a sunflower butter uncrustable. They’re school-safe, allergy-friendly, and the perfect base for this recipe because the SunButter and jam is already built right in. They come in grape and strawberry, either of which works deliciously here. And they have 3g of fiber and 7g of protein per serving, which is a nice little bonus! All you have to do is press them and let the waffle iron turn them into a delicious churro-y bread for our ice cream sammies.
Why the Waffle Iron Changes Everything
Look, you could absolutely use a Jammie straight out of the bag, they’re delicious. But pressing one in a waffle iron for a few minutes? That’s where the churro-y magic happens.
The heat caramelizes the outside into a crispy, golden shell while the sunflower butter and jam filling gets warm and melty on the inside. Spritz with oil and sprinkle on a little cinnamon sugar before it goes in, and you’ve got a lightly spiced exterior that pairs perfectly with cold ice cream.
The waffle iron also gives you those signature ridges, which means more surface area for the cinnamon sugar to crisp up on. The whole process takes about 4-5 minutes, and completely transforms a grab-and-go snack into a legitimate dessert “cookie.”
How to Make These PB&J Ice Cream Sandwiches
- Step 1: Press the Jammies. Preheat your non-stick waffle iron. While that’s warming up, tear open the Jammies and coat both sides of each with avocado oil spray and a generous sprinkle of cinnamon sugar. Press for about 4-5 minutes until browned and crispy on the outside. Move to a plate or wire rack, and freeze for 15 minutes. It’s pretty tricky to slice them in half when warm, that’s why this step is important.
- Step 2: Make the freeze-dried fruit dust. While the Jammies are cooling, add your freeze-dried grapes, strawberries, or a mix of both to a blender and blend to coarse crumbs. Alternatively you could crust them in a ziplock bag with a rolling pin until you have a colorful powder. Pour onto a shallow plate and set aside.
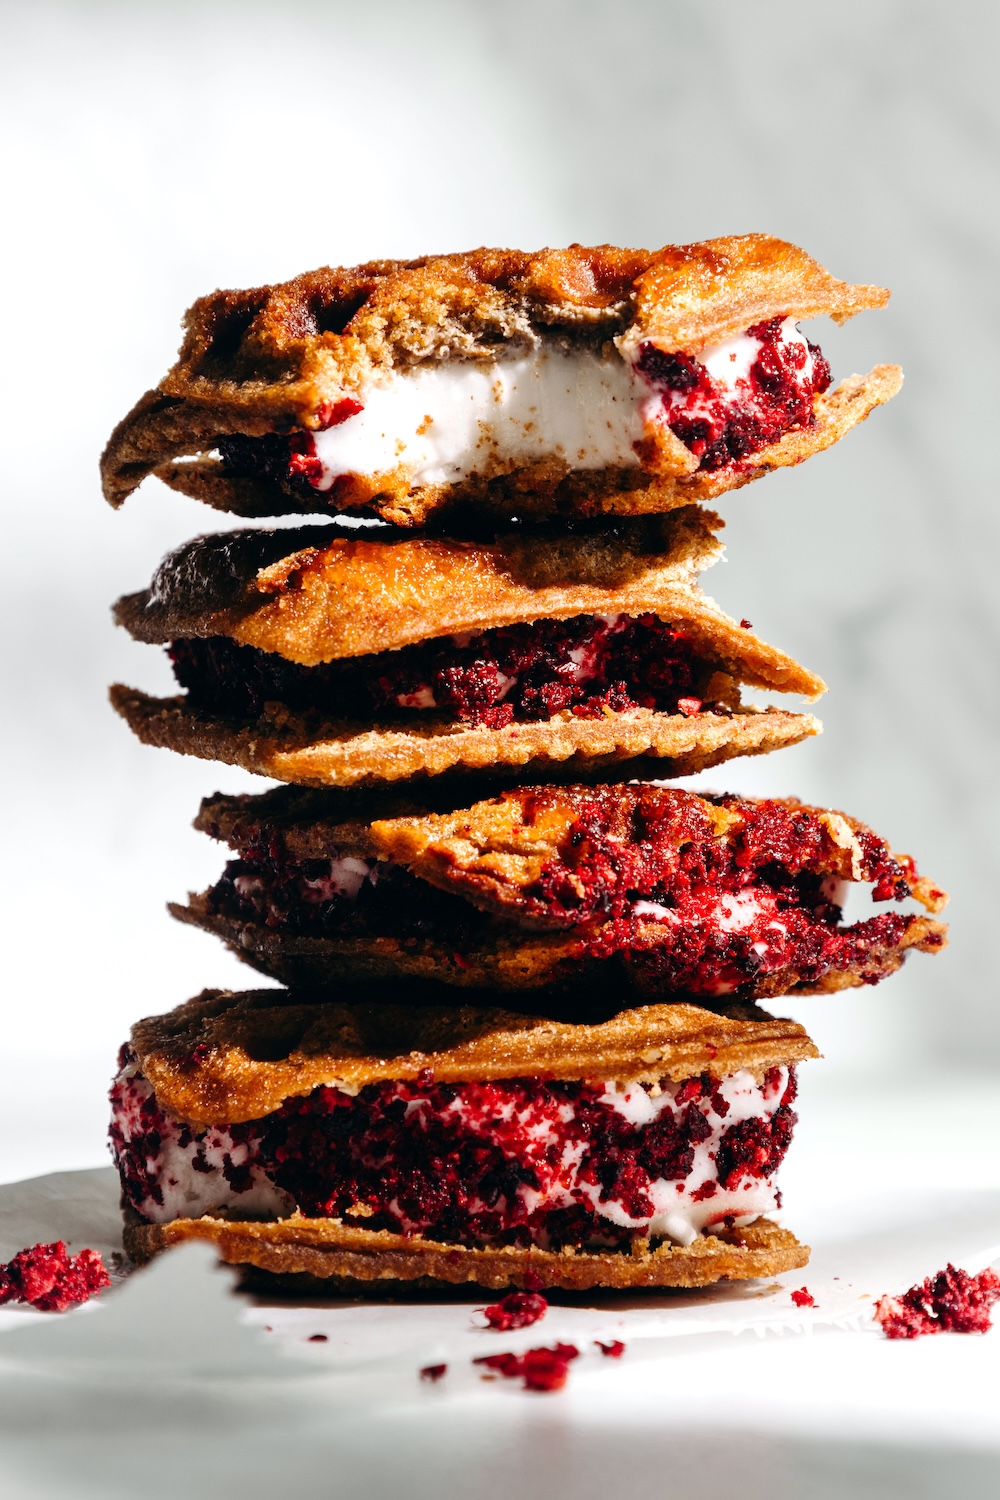
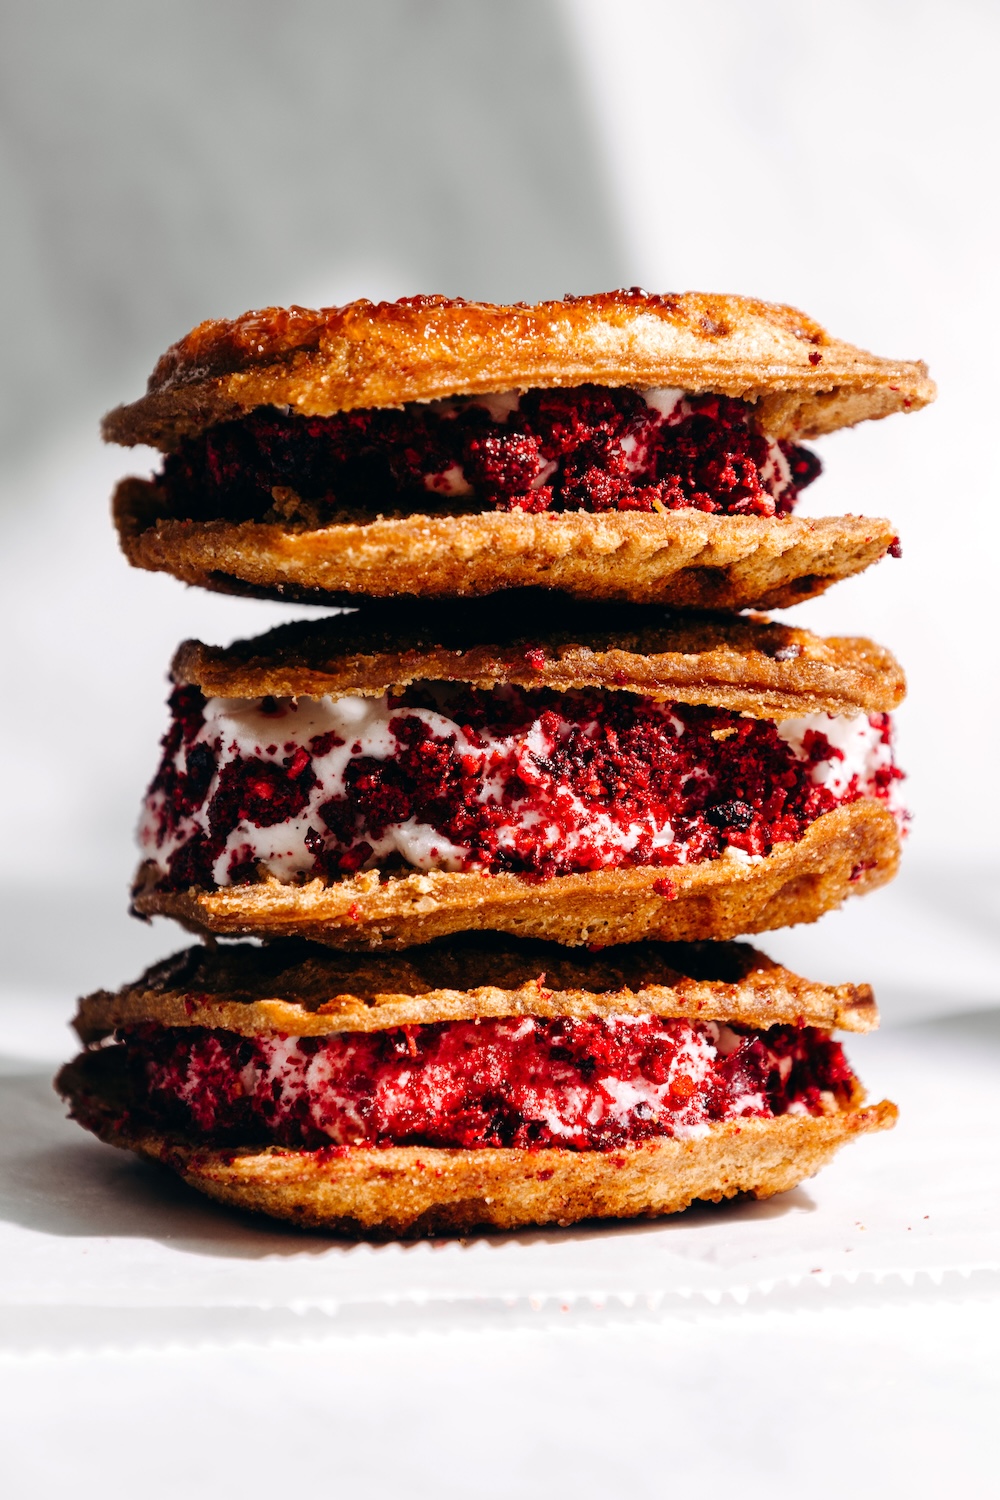
- Step 3: Assemble. Once your Jammies are cool, slice each in half to create two sides of the sandwich. Scoop a generous portion of dairy-free vanilla ice cream onto one side of each sandwich, and press a second Jammie on top. Work quickly here, you want the ice cream cold and firm enough to roll.
- Step 4: Roll in the fruit dust. Immediately roll the edges of your ice cream sandwich through the freeze-dried fruit dust, pressing lightly so it sticks to the ice cream. Serve right away, or place on a parchment-lined plate and freeze for 30–60 minutes for a firmer sandwich that holds its shape.
The Freeze-Dried Fruit Dust Trick
If you’ve ever had a Chipwich, you know the move — roll the edges of your ice cream sandwich in something that sticks, adds texture, and makes every bite more interesting. That’s exactly the energy here, just with a fruity twist.
Freeze-dried fruit is the perfect coating for a few reasons. It’s intensely flavored, grinds down into a fine dust in seconds, and stays crispy against the ice cream instead of getting soggy the way fresh fruit would. The result is this bright almost candy-like crust around the edges that’s naturally tangy-sweet
For this recipe I used freeze-dried grapes, which crush down into a deep burgundy-purple powder that leans right into the grape jelly filling of the Jammies. Freeze-dried strawberries work beautifully too and give a brighter pink result. Or mix both would be delicious and beautiful too.
Tips for the Best Results
- Give the Jammies their chill time before assembling. Not only does this make them easier to slice in half, it also ensures the ice cream doesn’t melt instantly and ruin that crispy shell.
- Don’t skip the cinnamon sugar. It sounds like a small detail but it’s what takes the Jammie from “toasted” to “dessert.” The sugar caramelizes against the waffle iron and creates that crackly, golden exterior that makes these SO good.
- Work quickly when rolling. Once the ice cream sandwich is assembled, you have a short window before things get melty. Have your fruit dust ready to go before you scoop so you can roll immediately.
- Use a cookie scoop for the ice cream. It gives you a uniform round scoops that are easier to press and sandwich. Slightly softened ice cream works best, not melty just pliable enough to spread to the edges.
- Freeze before serving a crowd. If you’re making these for friends, assemble them all, place on a parchment-lined tray, and freeze for at least 30–60 minutes.
- Press firmly but gently. You want good contact between the waffle iron and the Jammie for even crisping, but pressing too hard can burst the filling.
Recipe FAQs
Yes! SunButter Jammies are made with sunflower seed butter rather than peanut butter, making them completely tree nut and peanut free. The ice cream element is up to you, opt for a coconut or oat based frozen dessert to keep the sandwiches nut free.
Any dairy-free vanilla ice cream works. I like coconut milk-based ice cream as it tends to hold its shape the best when sandwiching and rolling. Or if you aren’t dairy-free, you can use regular vanilla ice cream too.
To keep with the flavor profile of Jammies, I like freeze dried grapes (unusual, but Trader Joe’s has them!) or strawberries. But anything works!
You can serve them immediately for a soft melty experience, or freeze for 30–60 minutes for a firmer sandwich that holds its shape better for parties.
More Nut-Free Frozen Desserts You’ll Love
- Chocolate Cherry Ice Cream Sandwiches
- Banoffee Ice Cream Pops
- Banana Chocolate Chip Frozen Yogurt Protein Bites
- Vegan Blender Chocolate Soft Serve
If you try these Waffle Iron PB&J Ice Cream Sandwiches, let me know what you think by leaving a comment or rating below! Be sure to follow along on Pinterest, Instagram, and Facebook for even more yummy recipes!

Waffle Iron PB&J Ice Cream Sandwiches (Nut-Free!)
- Prep Time: 15 minutes
- Chilling Time: 15 minutes
- Total Time: 30 minutes
- Yield: 4 sandwiches 1x
- Category: ice cream
- Method: freezer
- Cuisine: american
- Diet: Vegan
Description
Take SunButter Jammies, press them in a waffle iron with cinnamon sugar until golden and crispy, then sandwich with dairy-free vanilla ice cream and roll in freeze-dried fruit dust. The easiest nut-free, vegan ice cream sandwich of the summer!
Ingredients
- 4 SunButter Jammies (grape or strawberry or a mix!)
- Avocado oil spray
- Cinnamon sugar (1/4 cup cane sugar + 1 tbsp cinnamon)
- 1 pint dairy-free vanilla ice cream
- 1 cup freeze dried strawberries or grapes (or fruit of choice)
Instructions
- Preheat the waffle iron.
- Spray each Jammie with avocado oil spray and coat with cinnamon sugar on both sides.
- Press each Jammie in the waffle iron for 4-5 minutes until toasted and crispy.
- Place the Jammies in the freezer for 15 minutes. Once chilled, you can slice them in half more easily.
- Place a scoop of ice cream on one half of the sandwich, press with the other half of the sandwich. Repeat with all 4 sandwiches.
- Grind the freeze dried fruit in a blender to coarse crumbs.
- Roll the edges of the ice cream in the freeze dried fruit (or mini chocolate chips or sprinkles would be fun too!)
- Enjoy immediately, or freeze until ready to serve.
Keywords: dairy free, vegan, summer, dessert, ice cream, frozen, healthy, nut free


Leave a Reply