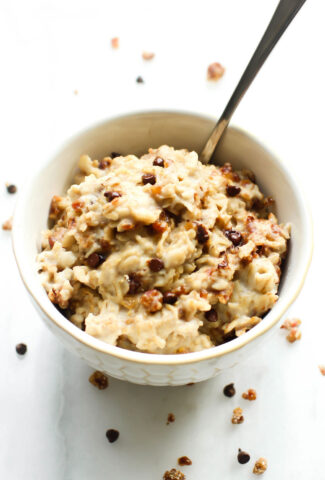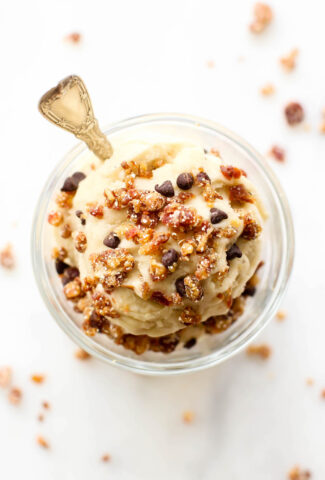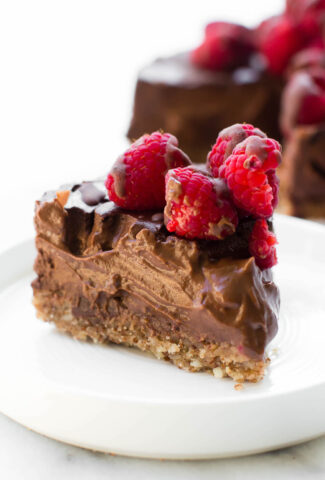
This insanely decadent Chocolate Mousse Cake may taste like a rich dessert indulgence but it’s made from just a few healthy whole-food ingredients right in the blender!

You are going to think I am exaggerating when I say this, but this cake tastes like chocolate frosting. On top of a crust. And it’s low fat. And I am not exaggerating at all, that was typed with a completely straight face. I even ate the last trial straight with a spoon like I used to do with frosting to be sure–it’s a perfect match!
And not just any chocolate frosting either, I’m talking about the chocolate fudge kind that comes in the plastic canister with the red lid and peel-back silver top. The kind that seems way too creamy and perfect to be true. And if by “true” you mean made from actual real naturally-occuring foods then it’s not. The kind with corn syrup as the first ingredient. Yep, that hate-to-love it stuff.

This cake has the same dreamy texture and decadent taste, but created with a completely different mix of ingredients. Not only are the ingredients leaps and bounds healthier, there are fewer of them too. The filling is actually made with just four simple ingredients: a fruit, a root, chocolate, and non-dairy milk. And just two for the crust, inspired by my favorite tart crust.
To turn this oddball mix of things into the dreamiest of creamiest frosting-like fillings requires some serious blending power. Which brings us to the other, non-edible part of what makes this recipe special: my Vitamix.

You may have noticed a slightly different blender starring in my recipe videos lately, the new clear plastic top is kind of a dead giveaway. That beautiful machine is the Vitamix A3500, part of Vitamix’s new Ascent Series.
After having the chance to get to know this new model over the past couple of months, I must say I love it. I love it all the way from its streamlined base to it clear snap-on lid that makes overhead blending shots 10 times more interesting to watch. And trust me the blades and blending power are as sharp and strong as ever!

Touch controls. Start, stop, faster, slower, pulse–it’s all done by touch. Except for the main dial, the entire control interface is touch screen (hello flat and easy to clean!) It took me less time to figure out the basics of how to operate the touch screen display than it did to unwrap the users manual. It is very intuitive especially if you are used to the controls on previous Vitamix models.
Built-in programs. In addition to the usual 1-10 dial, this blender comes with 5 different built-in blending programs as well as a timer that either shows you how long you’ve been blending (great for writing recipes!) or can be set to blend for a certain length of time.
Of the built-in program options, I definitely use the frozen dessert and smoothie ones the most. I usually stand by for a bit to add more liquid or use the tamper as needed with those, but once it gets going it comes out creamy and perfect every time. It is especially nice if you are like me and make the same go-to smoothie frequently so you know the amounts already. I can clean-up and put stuff away while it blends without having to worry about over-blending, which I love. It’s like smoothie autopilot! And the countdown timer is nice too so I’m not just guessing how much longer it has to go.
A quick note. Because of all these smarter features, the containers from previous models do not work interchangeably with this base. Only Self-Detect containers do. I was a little surprised by this at first as I used to use my smaller 32oz container most of the time. However, I’ve gotten used to using the 64oz container and this one has quickly become my go-to blender for pretty much everything. And supposedly more Self-Detect containers/sizes are coming soon, so that’s exciting!

The bubble button! I can’t even tell you how much I love this. If you are anything like me and too often give in to the rinsing-is-good-enough temptation, then this little feature will save your beautiful blender container from getting the dreaded cloudy-not-clean look. One button, walk away, and 35 seconds later it’s clean. The lid, the sticky stuff on the sides, the bothersome bits under the blades–all of them = gone.
In the past I would turn my blender on to clean, walk away, get sidetracked, and come back to bubbles overflowing out the top. The fact that it shuts itself off saves me from cleaning up the clean up. And makes it impossible to rationalize just rinsing.

In action. Like I said, this machine has already made it’s debut in a few of my videos.
You can see it…
-Here making an extra frothy matcha latte
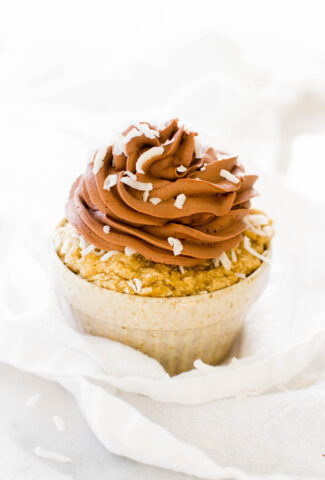
-Or here making cupcakes
-And here turning breakfast into a piece of (pan)cake
-And in many more soon-to-be-posted recipes!
This post is not sponsored, but I was sent this product in exchange for my honest review. If you want to learn more about this smart little self-sufficient superstar of a kitchen appliance, you can check it out -> here

Now let’s get to the elephant moose in the room, this Chocolate Mousse Cake!

One bite…okay let’s be honest, I didn’t stop to breathe think about anything until the whole first slice was demolished. One slice in and I was already thinking that THIS is the sort of elegant-meets-decadent, always-appropriate dessert that I will be whipping up for any and every special occasion from now until chocolate goes out of style (which we both know will never actually happen!)

Happy frosting-by-the-slice eating!
Print
Chocolate Mousse Cake
- Prep Time: 15 minutes
- Cook Time: 50 minutes
- Total Time: 65 minutes
- Yield: 6 " round cake 1x
Description
This insanely decadent Chocolate Mousse Cake may taste like fudge frosting but is made from just a few healthy whole food ingredients right in the blender!
Ingredients
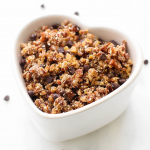
Crust
- 2 cups almonds
- 2 tbsp maple syrup
- 1 tbsp water (if needed)
Mousse
- 1 cup baked and mashed sweet potato
- 1 cup Medjool dates
- 1 1/2 cups non-dairy milk
- 1/3 cup cacao powder
Instructions
- Grind the almonds in a blender until they resemble a fine meal.
- Add the maple syrup and blend until you have a clumpy mixture. Add 1 tbsp of water if necessary so that it sticks together when pressed.
- Place a piece of parchment paper in the bottom of a 6 inch spring-form pan. Press the crust evenly into the bottom of the pan. Set aside.
- Preheat the oven to 350F.
- Combine all the mousse ingredients in a blender. Blend on high until very smooth and creamy.
- Pour on top of the crust and smooth the top.
- Bake for 45-50 minutes at 350F.
- Remove from the oven. Cool, then refrigerate overnight.
- Serve chilled from the fridge with berries or whipped cream on top!
Pin It